


As a parent, you know you can’t protect your little ones from every danger they may encounter as they learn how to navigate their world. For many children, the worst they’ll suffer from being overly curious is a skinned knee or bumped forehead.
There are some situations, though, when understanding basic life-saving techniques could be the difference between recovery and death for a child.
Based on the American Heart Association’s ACLS algorithms and pediatric emergency care guidelines, these life-saving techniques can help buy you precious moments in an emergency until first responders arrive.
Pediatric Basic Life Support (BLS)
Before learning specific techniques, it’s essential to know Pediatric Basic Life Support. This step-by-step process outlines how parents, bystanders, and others who are not medical professionals should respond when a child experiences cardiac arrest.
Cardiac arrest is something we most commonly associate with older adults, but it is the cause of death in 3-5% of children aged 5-19 and 10-15% of infants.
The first step is prevention and knowing the signs of cardiac arrest:
Chest pain
Fainting
Extreme shortness of breath
Dizziness
Bradycardia
Tachycardia

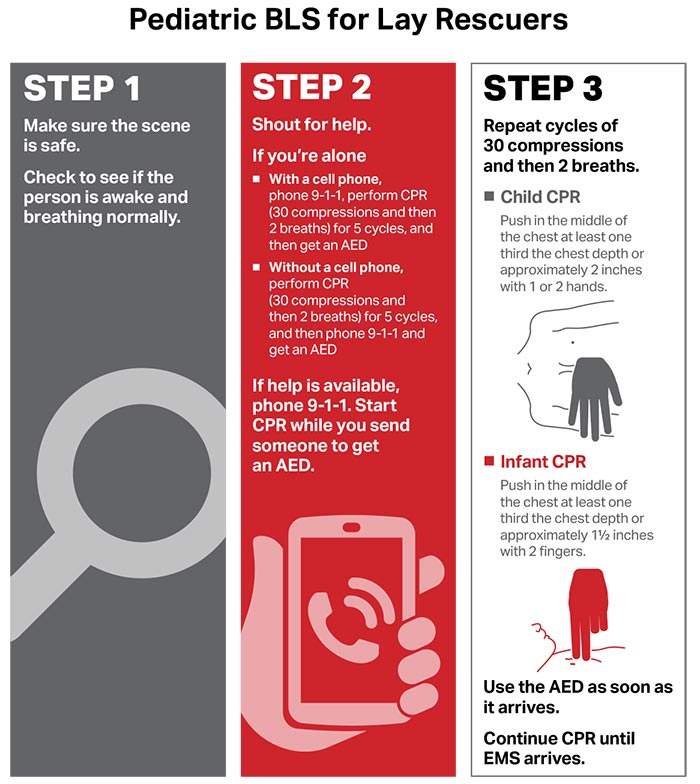
The 3-step ACLS algorithm for Pediatric BLS includes:
Step 1
Ensure the area is safe, then check whether the child is awake and breathing.
Step 2
Shout for help if you are in a public place. Use your cell phone to call 911. As you wait for first responders, perform CPR for 5 cycles of 30 chest compressions and 2 rescue breaths.
As soon as an AED is available, use it on the child.
Step 3
Continue performing CPR in 30 compressions and 2 rescue breath cycles until EMS arrives.
Checking For A Pulse
If your child is experiencing dizziness, shortness of breath, or chest pain, checking their pulse can help you identify signs of an abnormal heart rate, which falls into two categories.
Tachycardia
Tachycardia is an abnormally high heart rate. This number changes as children get older:
More than 160 BPM in infants.
More than 150 BPM in toddlers.
More than 140 BPM in children.
More than 130 BPM in adolescents.
Bradycardia
In contrast to tachycardia, bradycardia refers to an abnormally low heart rate.
Less than 100 BPM in infants.
Less than 80 BPM in toddlers.
Less than 70 BPM in children.
Less than 60 BPM in adolescents.
Checking An Infant’s Pulse
Infants have much smaller blood vessels than older children, so you’ll want to use their upper arms to find their brachial pulse.
Place your pointer and ring finger on the inner arm below the shoulder but above the elbow.
Count the number of beats you feel for 15 seconds.
Multiply that number by 4 to get their beats per minute (BPM).

Checking A Child’s Pulse
You can use the radial (wrist) or carotid (neck) pulse when checking children older than 24 months.
You’ll use the same technique as you would with an infant, but with your fingers on their wrist just below the thumb or on their neck to the left or right of the windpipe, underneath the jawline.
Pediatric Rescue Breathing
Rescue breathing is a technique that involves blowing oxygen-rich air into a child’s lungs to keep their blood oxygen levels high enough to sustain life until medical professionals can intervene. Parents can use rescue breathing alone or in conjunction with CPR.
Some situations that require rescue breathing but not CPR include near-drowning, accidental or intentional drug ingestion, an asthma attack, and windpipe obstruction.
If you notice that the child’s pulse has stopped while providing rescue breathing first aid, begin chest compressions immediately.
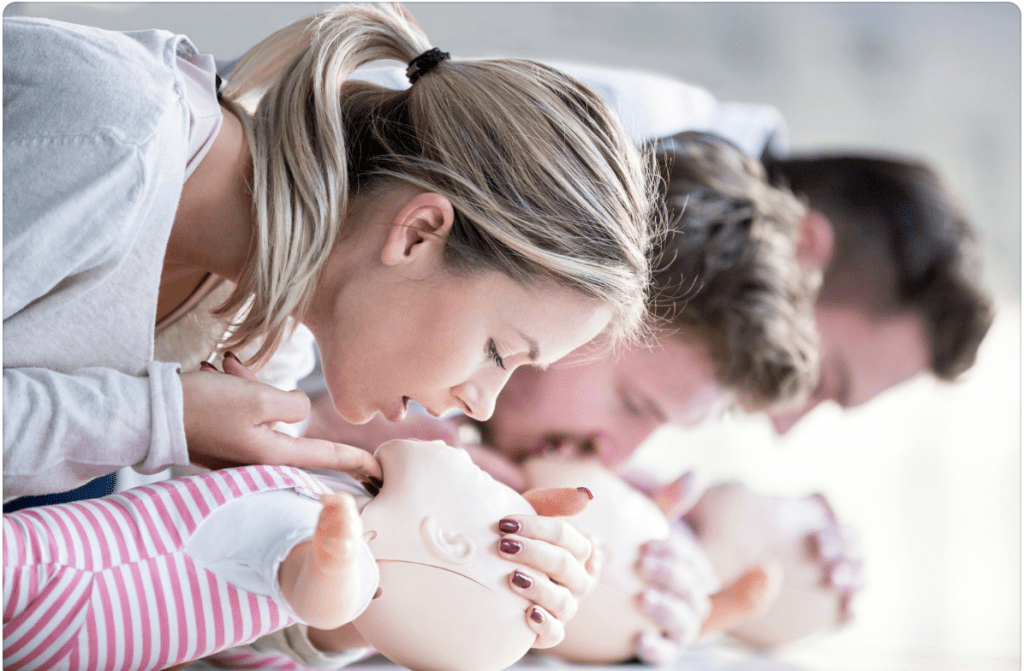
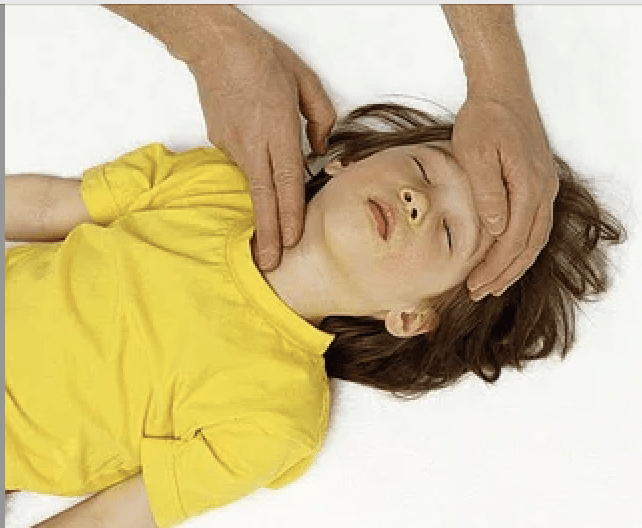
Pediatric Rescue Breathing For Infants And Toddlers
Call 9-1-1.
Place your hand on the infant’s forehead and gently tilt their head back to open up the windpipe.
Use your other hand to lift the baby’s head upward.
Form a seal around their nose and mouth with your mouth.
Gently breathe into their mouth for one second. Repeat every five seconds. The goal is between 5-6 breaths per minute.
Watch to ensure that the baby’s chest rises as you blow. Wait until it falls again before giving the next rescue breath.
Repeat steps two and three to reopen the windpipe if the chest doesn’t rise.
Continue until the infant begins breathing on their own or medical professionals arrive.
Pediatric Rescue Breathing For Children And Adolescents
When performing pediatric rescue breathing on older children and adolescents, the process is the same except for how you place your mouth.
Instead of forming a seal over the nose and mouth, use your fingers to pinch the child’s nostrils closed gently. Then, place your mouth over their mouth and begin emergency care.
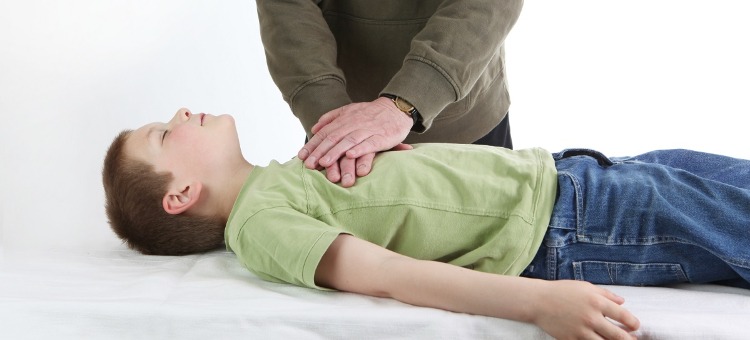
Performing CPR
CPR, or cardiopulmonary resuscitation, is a series of compressions and mouth-to-mouth breathing to restore a normal heart rhythm and keep blood flowing through the body.
Performing high-quality CPR following an out-of-hospital cardiac arrest increases a child’s survival rate from 1.9% to 4.3%. While those numbers are still grim, parents must respond as quickly as possible until EMS arrives.

Performing CPR On An Infant
Place the infant on their back on a flat surface, then kneel or stand beside them.
Put both thumbs in the center of the chest, below the nipples.
Wrap your other fingers around the baby’s ribs to support the back.
Push both thumbs 1.5-inches down, moving hard and fast. Repeat 30 times at a rate of 100 beats per minute.
Give the infant two rescue breaths, blowing for one second.
Repeat.
Performing CPR On A Toddler Or Small Child
Place the toddler on their back on a flat surface and kneel beside them.
Position the heel of one hand in the center of the chest.
Push your hand down hard and fast 2-inches into the chest. Repeat 30 times at a rate of 100 beats per minute.
Give the toddler 2 rescue breaths for 1 second.
Repeat.
Performing CPR on a Child
Place the child on their back on a flat surface and kneel beside them.
Position your hands so that one heel is on the chest and the other is on top, with the fingers interlocked.
Center your shoulders over your hands and lock your elbows.
Push your hand down hard and fast 2-inches into the chest. Repeat 30 times at a rate of 100 beats per minute.
Give the child 2 rescue breaths for 1 second.
Repeat.
No matter the age of the child, continue compressions and breaths until one of the following occurs:
EMS arrives.
You have access to a charged AED.
The child shows signs of life.
You are too tired to continue.
You have performed CPR for 2 minutes and need to leave the scene to call 9-1-1.
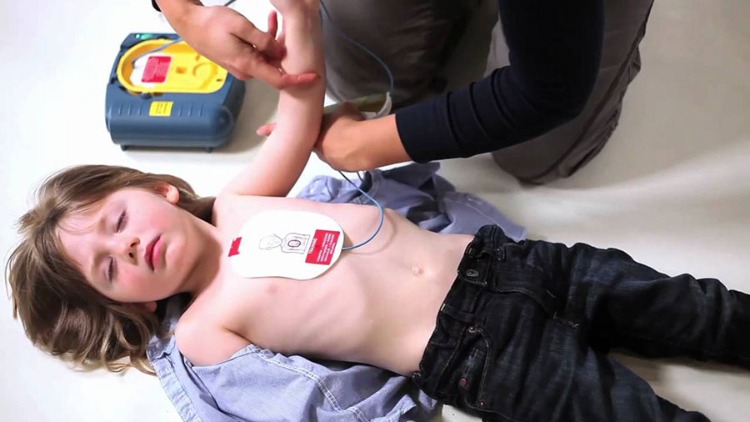
Using an AED
An AED, or automated external defibrillator, consists of a box-shaped device with two electrodes attached. When you press the electrodes against someone’s chest, the internal computer measures their heart rhythm.
If the device detects that the heart rate is abnormal and defibrillation is necessary, an audio prompt directs the user to press a button. This button delivers a jolt of electricity to the heart, temporarily stunning it.
In many cases, this sudden shock helps the heart regain its natural rhythm and can keep a child alive until EMS can transport them to a hospital for medical care.
Parents should always use an AED as soon as it is available. If you are fortunate enough to be near one when a child goes into cardiac arrest, do not perform CPR until after you attempt to shock the heart back into rhythm.
Using An AED Device On A Child Or Adolescent
Open the AED case and turn the device on.
Expose the chest by removing or opening the child’s shirt. If their chest is wet, dry it thoroughly.
Move any other obstructions, like jewelry or hair, off the chest.
Peel the protective paper away from the electrode pads.
Place one of the pads on the upper right side of the chest.
Place the other pad on the lower left side of the chest.
Do not allow the pads to touch.
Check that all wires are attached to the primary device.
Move away from the child while the AED analyzes their heart rate.
Listen for the audio prompt “Shock.”
Press and hold the flashing button labeled “Shock” until the device activates.
If the child is still unresponsive, leave the pads attached to the child and perform CPR for two minutes.
Repeat steps 8-11 until help arrives.
Using An AED On An Infant Or Small Child
If the child is too small for both pads to fit on their chest, place one on their chest and one on their back.
When your child experiences a medical emergency, you must not panic. Instead, call 9-1-1 and begin emergency first aid as quickly as possible.
A helpful acronym to remember the order of BLS is CAB: Compressions-Airway-Breathing. When providing emergency care to a child in cardiac arrest, begin with compressions before clearing the airway and performing rescue breathing.
Learning these techniques is vital for parents. Cardiac arrest is a severe, very deadly condition. Still, you can increase a child’s chance of survival by arming yourself with life-saving techniques and remembering the steps of the ACLS algorithms.
WE SAID THIS: Don’t miss… Everything You Need To Know About Protecting Your Baby While They Sleep
